DIY Planter Box
So you want to build a planter box? Awesome. Gardening is fun and good for your soul. Humans have been growing food for thousands of years, and so can you. You just need a box full of dirt. This guide will point you in the right direction to build a simple planter box that will last for years. The most difficult part will assuredly be getting motivated to drive to the hardware store. So roll up your sleeves, jot down the tools and materials you'll need (listed below), make a trip to the hardware store, and get building.
Table Of Contents
- What kind of tools do I need to build a planter box?
- What materials do I need for a planter box?
- What is the best type of wood for a planter box?
- How big should my planter box be?
- Let's build this thing already
What kind of tools do I need to build a planter box?
You'll need a cutter, a driller, a pounder, and some other stuff. If you don't already have these tools this project is going to be a bit more expensive. Maybe you can barrow some or all of them from a friend?
- Hand saw
- Power drill
- Drill bit set
- Star screw bit
- Tape measure
- Pencil
- Wire cutters
- Hammer

What materials do I need for a planter box?
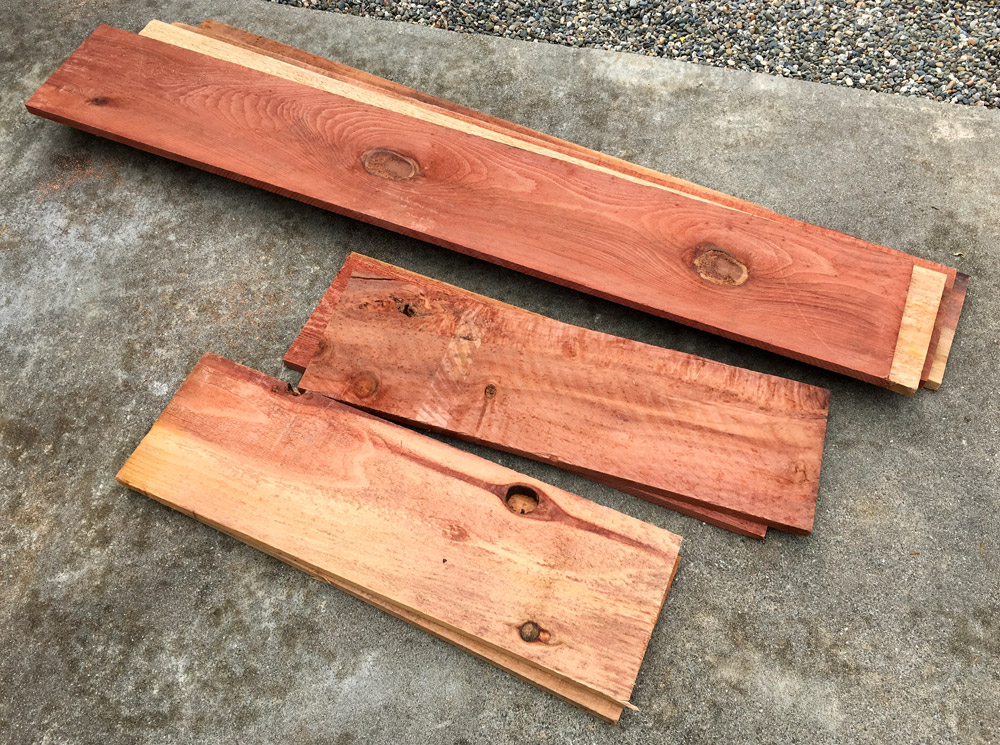
The materials needed for this plater box are pretty simple. There are details below about what type of wood can be used for planter boxes. In addition to good 'ol fashion wood, you'll need some screws, washers, fencing staples, and mesh wire. Don't forget the planter soil. Depending on your box's dimensions you'll need a lot more soil or compost than what's pictured below.
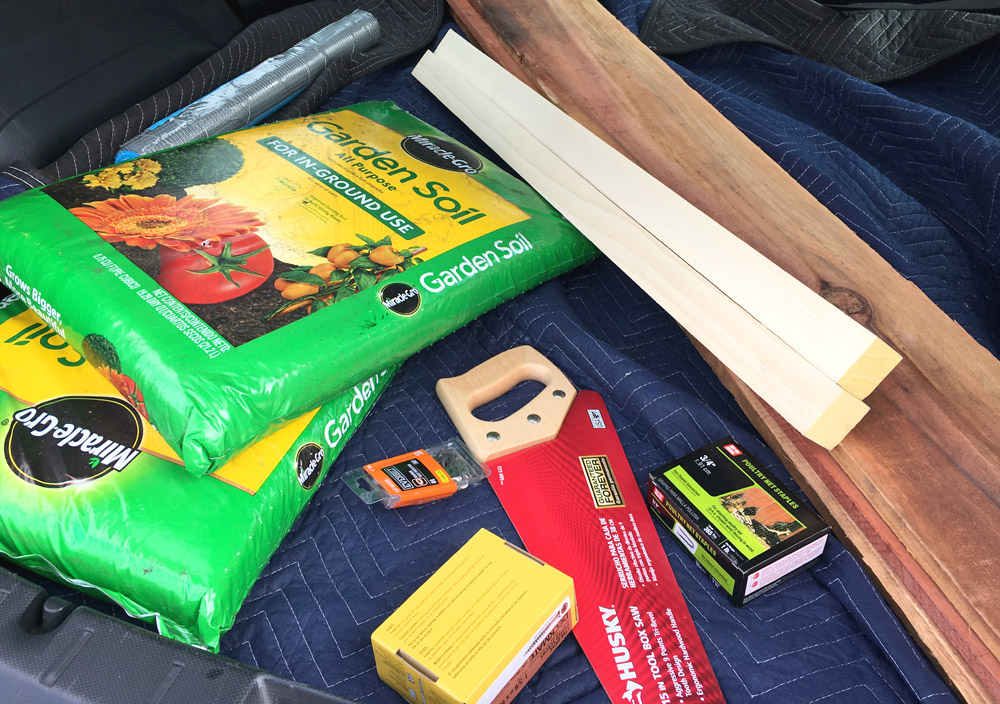
For the screws get 1 & 5/8 inch star-bit screws. This is the correct depth to fasten our 3/4 inch thick side-boards to our 1 & 3/4 inch posts. I use star-bit screws for just about everything. They grip better and are less likely to strip. You can instead use nails but I recommend screws. Screws are easier to take apart should you ever want to move your box.
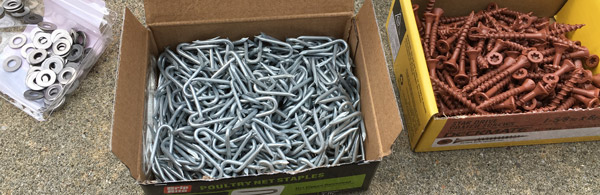
Make sure to get small fencing staples, also known as "U" nails. I made a huge mistake and got large U nails, which almost split the bottoms of my boards.
The mesh wire, also known as hardware cloth, should have very small holes. This keeps the dirt in (more tips below), rogue roots out, and allows the entire bottom to drain. I used 1/4 inch 23 gage mesh wire.
Here is a list of all the materials you'll need assuming an 18 inch deep, 6 foot long, and 2 foot wide planter box (in "rough" board dimensions, read about actual dimensions).
| Quantity | Material | Size |
|---|---|---|
| 4 | Redwood boards | 1 x 8 foot |
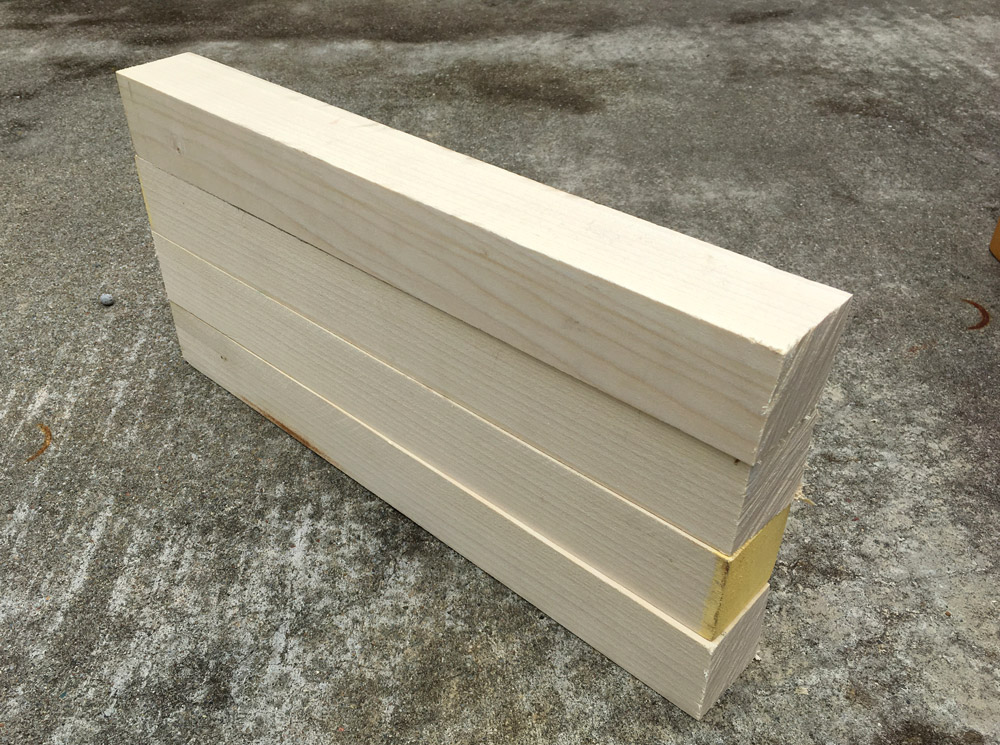
| 82 in | Square dowels | 1 & 3/4 inch |
| 34 | Star-bit screws | 1 & 5/8 inch |
| 34 | Washers | Small |
| 2 x 6 sq. ft | Mesh wire | 1/4 inch 23 gage |
| 18 | Fencing staples | Small |
What is the best type of wood for a planter box?
I chose untreated redwood because it is naturally water-resistant. While redwood is more expensive than most alternatives, it can last up to ten years completely untreated. If you plan on growing food in your planter box you might want to avoid pressure treated wood. The chemicals used in wood treatment, to make them insect and weather resistant, can leach into the soil becoming absorbed by the delicious things you'll be growing.

Alternatives to redwood for planter boxes include cypress, cedar, and pine, though each will stand up to the weather differently left untreated.
For my box I chose to use one-by-eight boards (1 inch thick by 8 inches wide), stacking them two high for adequate depth. Boards are often pre-cut to eight foot lengths. This helped me choose final dimensions since I didn't want any scraps leftover at the end.
Note about board dimensions
Board dimensions are referenced by their initial "rough" cut. So a 1 inch by 8 inch board is actually 3/4 inch thick and 7 & 1/4 inch wide after being plained and finished (What!?). For our uses the lumber's actual size makes no difference as long as we measure to the actual dimensions. This is an important thing to be aware of while making calculations.
In addition to the redwood siding you'll need dowels for corner posts and a midsection brace. Any kind of hard-wood posts should do. I used 1 & 3/4 inch square dowels.
How big should my planter box be?
The dimensions of your planter box are totally up to you and depend on how much plant stuffs you plan on growing. Depth is an important factor as you want to make sure your plants have plenty of space to grow roots. Anything deeper than a foot should do the trick, but ideally some extra depth will make for happier plants. I suggest stacking two 8 inch wide boards to make a 16 inch deep planter box.
You can build your planter box in any shape, but a square or rectangular box is going to be much simpler to construct than an octagonally shaped one (instructions for octo-boxes not included). I chose to make my box rectangular so it will be easy to access the middle of the box. Since I had eight foot long boards I chopped each at two feet—forming sides for a two by six foot box.
Let's build this thing already
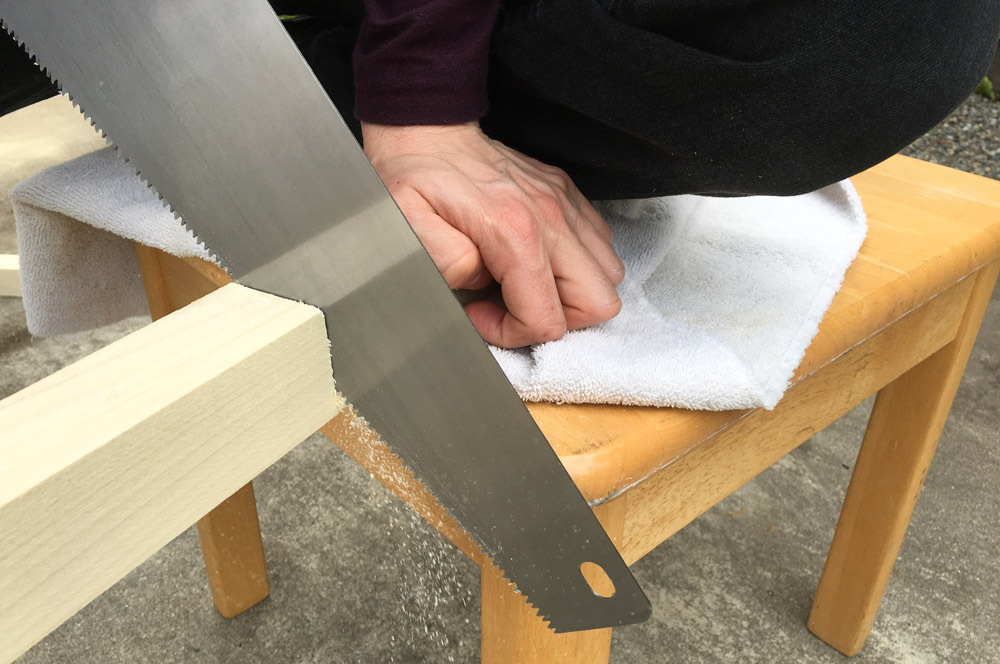
Assembling your planter box should take an hour or two if you are cutting the boards by hand like I did. If you are one of the fortunate ones with a power saw you'll slap this box together and be filling dirt in no time.
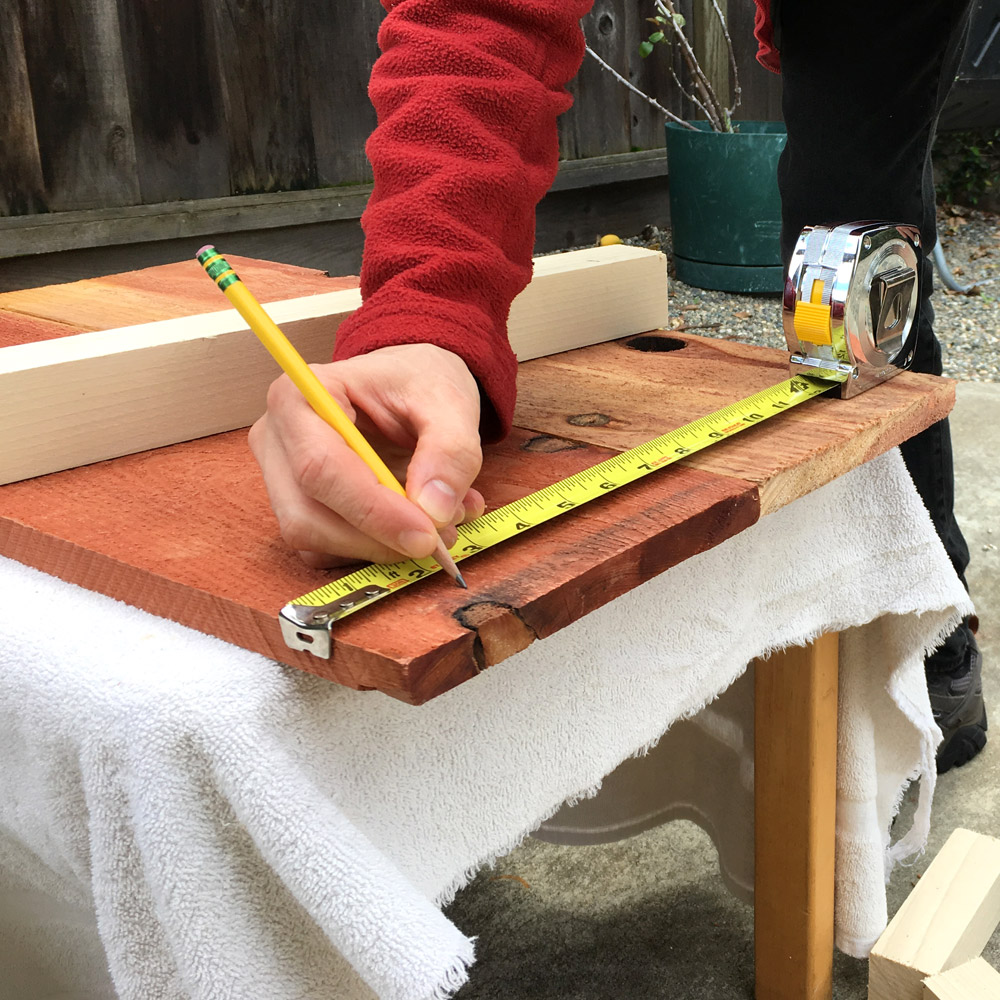
1. Saw up some boards
With a tape measure mark two feet on each of the four boards. Using a straightedge draw a perpendicular line across the board where you plan to cut. Sawing by hand requires a line for the entire cut to keep things straight, compared to making a small mark on the edge which leads to imprecision.
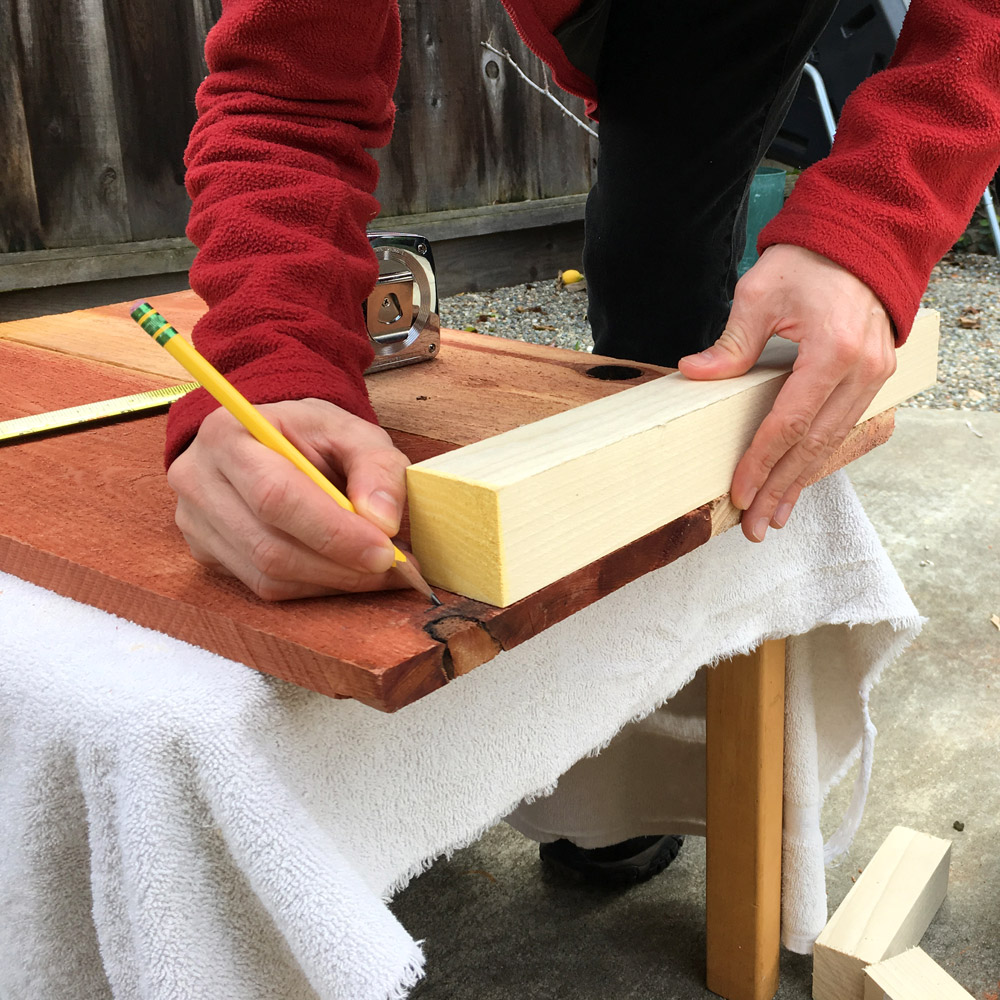
Next do the same with the 1 & 3/4 inch square dowels, marking lengths for four posts at 14 & 1/2 inches (the "actual" width of two "eight inch" boards).


Chop two feet off each of the four redwood planks, leaving you with four six foot boards and four two foot boards.

Cut four lengths of the square dowel to 14 & 1/2 inches, which is the height of two redwood boards stacked vertically.
If everything goes well you should have:
- (4) 6 foot long redwood boards
- (4) 2 foot long redwood boards
- (4) 14 & 1/2 inch tall posts
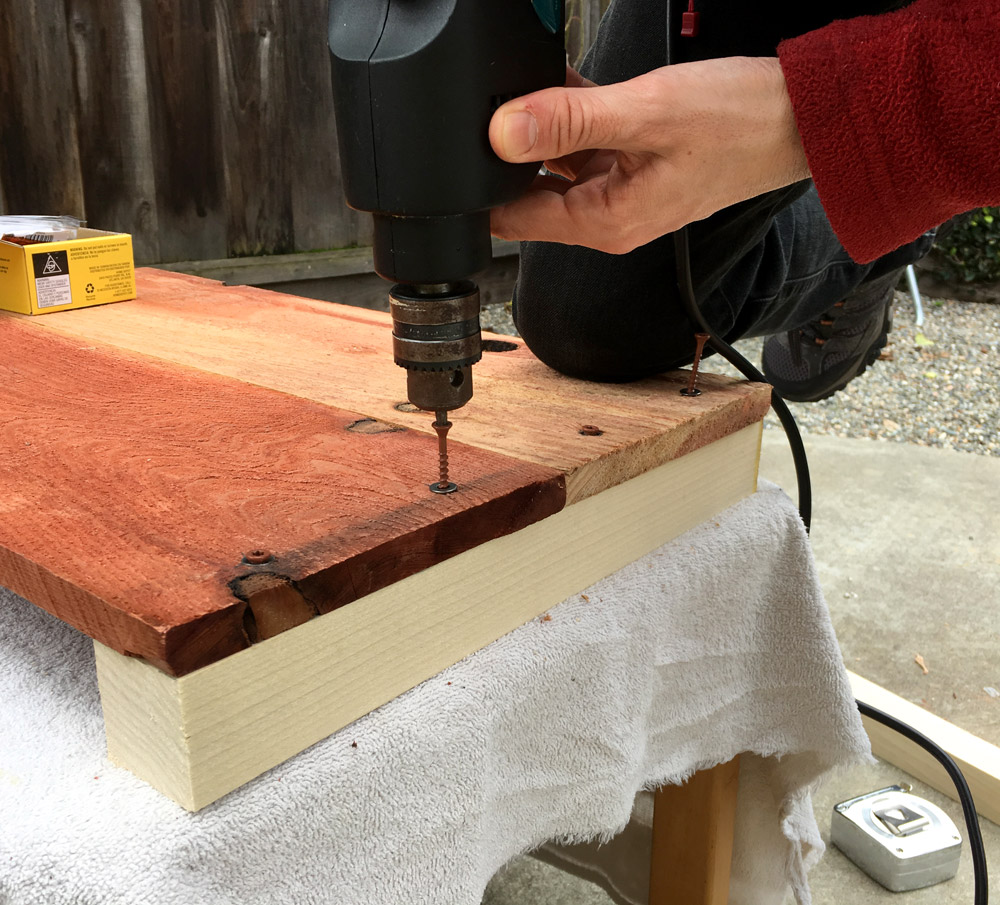
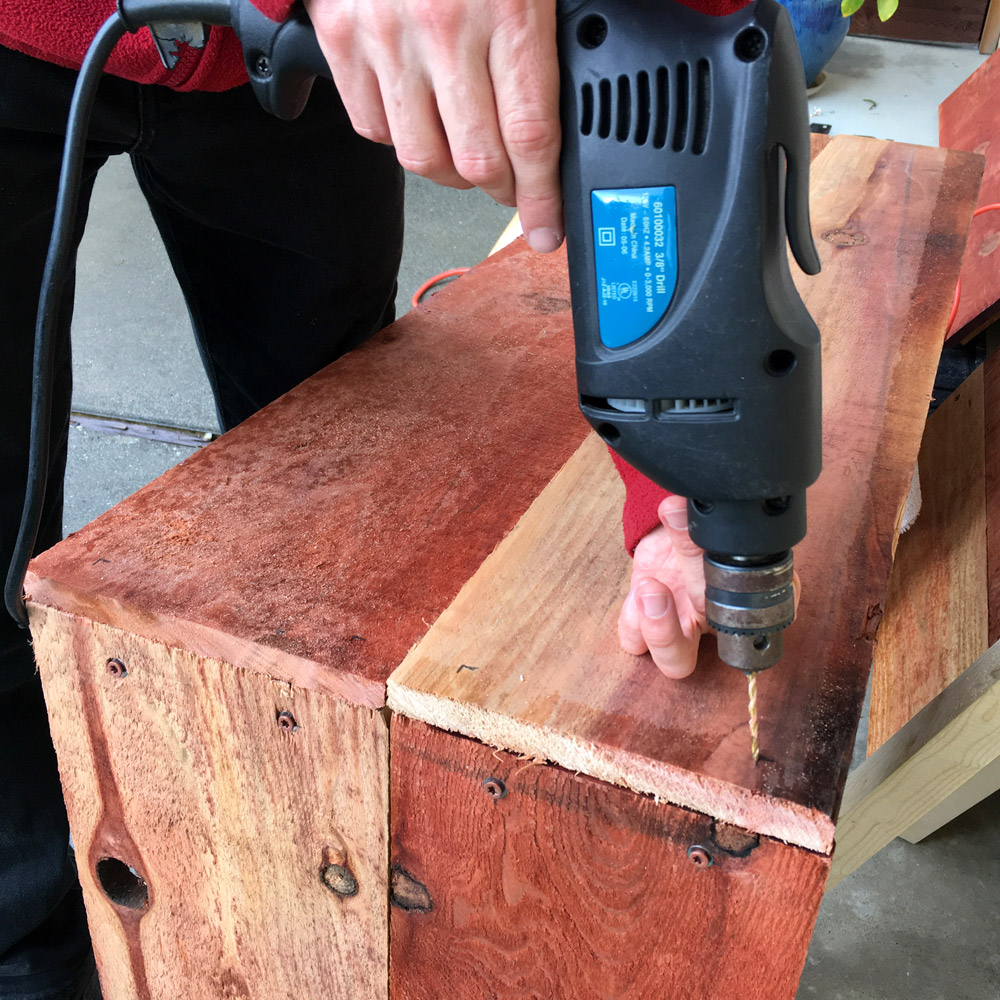
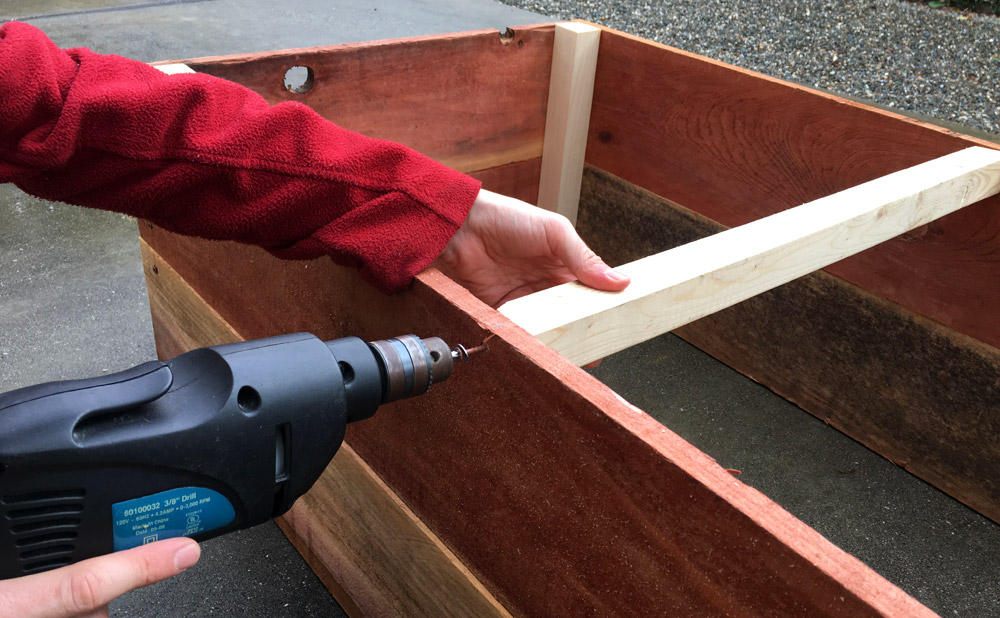
2. Predrill yer holes
Untreated redwood splits easily. Predrilling "pilot" holes for your screws will ensure you don't make a dumb mistake and ruin one of your boards (and have to go back to the hardware store, you really don't want to go back to the hardware store).
Embrace your compulsiveness and measure consistent and symmetrical targets for each screw. These will be used to mount the shorter two foot redwood boards to the posts.
Drill the pilot holes through both the redwood and its corresponding post at the same time. Use a drill bit about the same width as the inner core of your screws. Be cautions that your holes are not too big. If needed, err on the smaller side. You can always re-drill bigger hoes. Drilling smaller holes is literally impossible.

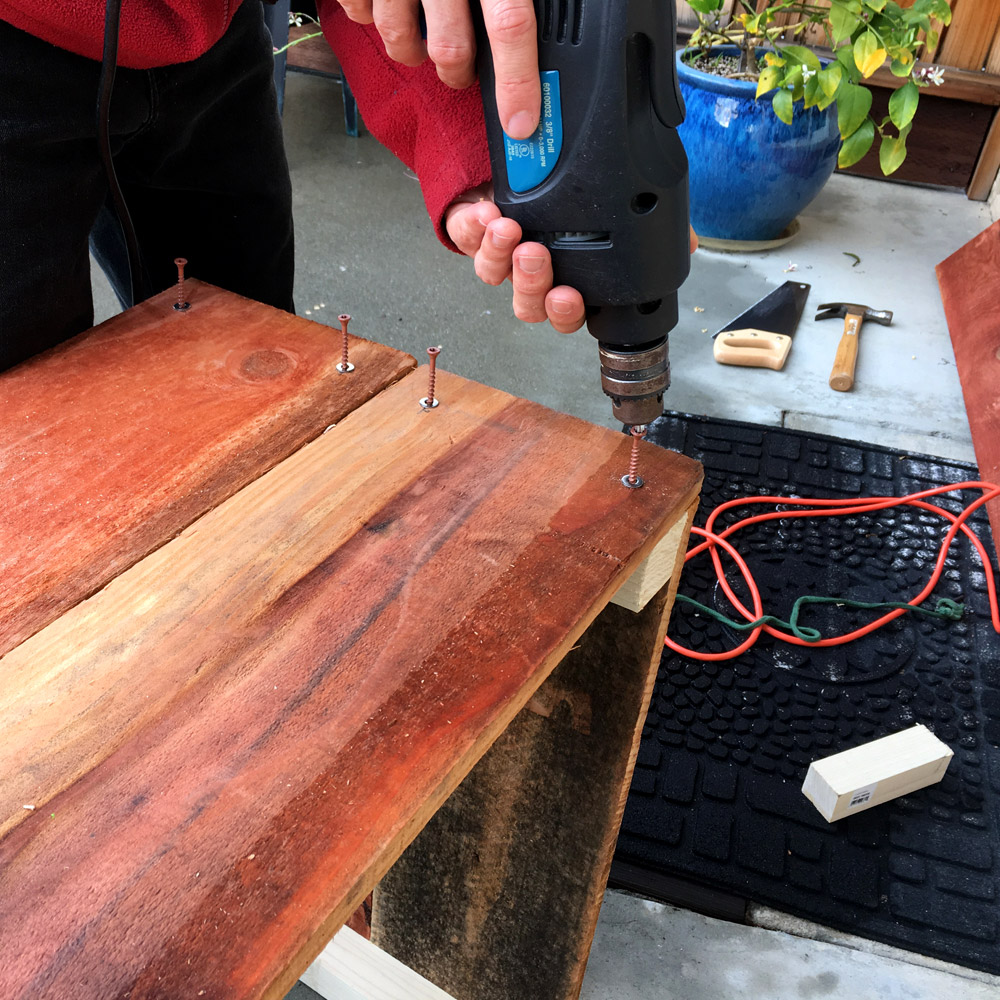
3. Putting it together
Attach the shorter two-foot boards to the posts first. Thread the screws with washers and sink them into your pilot holes. The washers help catch the screws, preventing them from driving too deep, and increase joint longevity by distributing the screw pressure on the wood.

After getting rained on while assembling the two ends, mark, predrill, and fasten the longer boards onto the posts, forming a rectangular box. Stagger the holes for each side to avoid collisions with the screws from the perpendicular direction. Pretty exciting stuff.

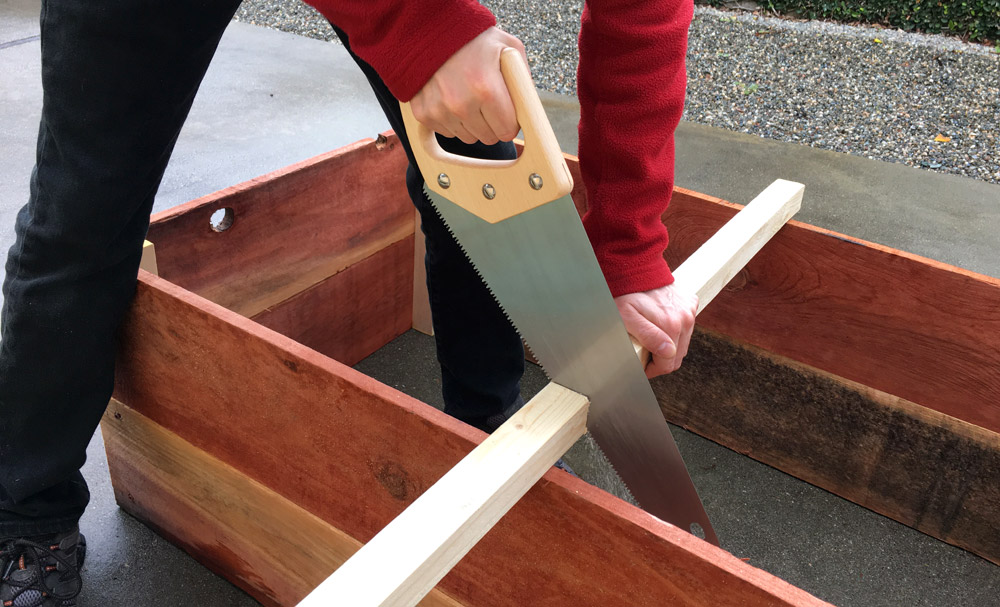
4. Add a cross brace
Pro tip from my dad: add a cross brace across the middle of the bottom of the box. Since the sides are four feet long, a cross brace in the center will help keep the boards from bowing outward under the weight of the soil.
Time for more chopping. If you attached the posts flush with the edges of the shorter two foot boards (as pictured) then your cross brace should be exactly two feet. Measure, cut, predrill (always predrill), and screw (with washers) the cross brace.

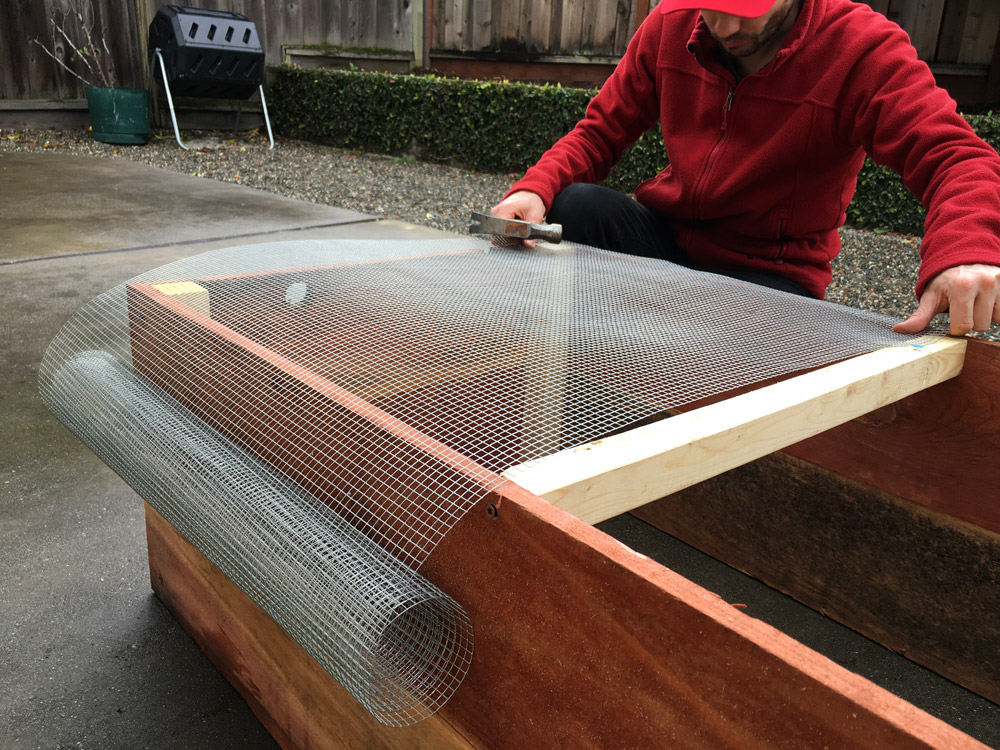
4. Attach the bottom
Choose which side you want to be the top then flip the box over. Roll out the wire mesh so it covers half the bottom, then tack it on using U nails all the way around. As noted above, don't use big U nails (like I have pictured here), try to purchase small more "staple" like U nails if you can. These big nails split the bottom of one of my boards (it's okay, nothing's perfect).

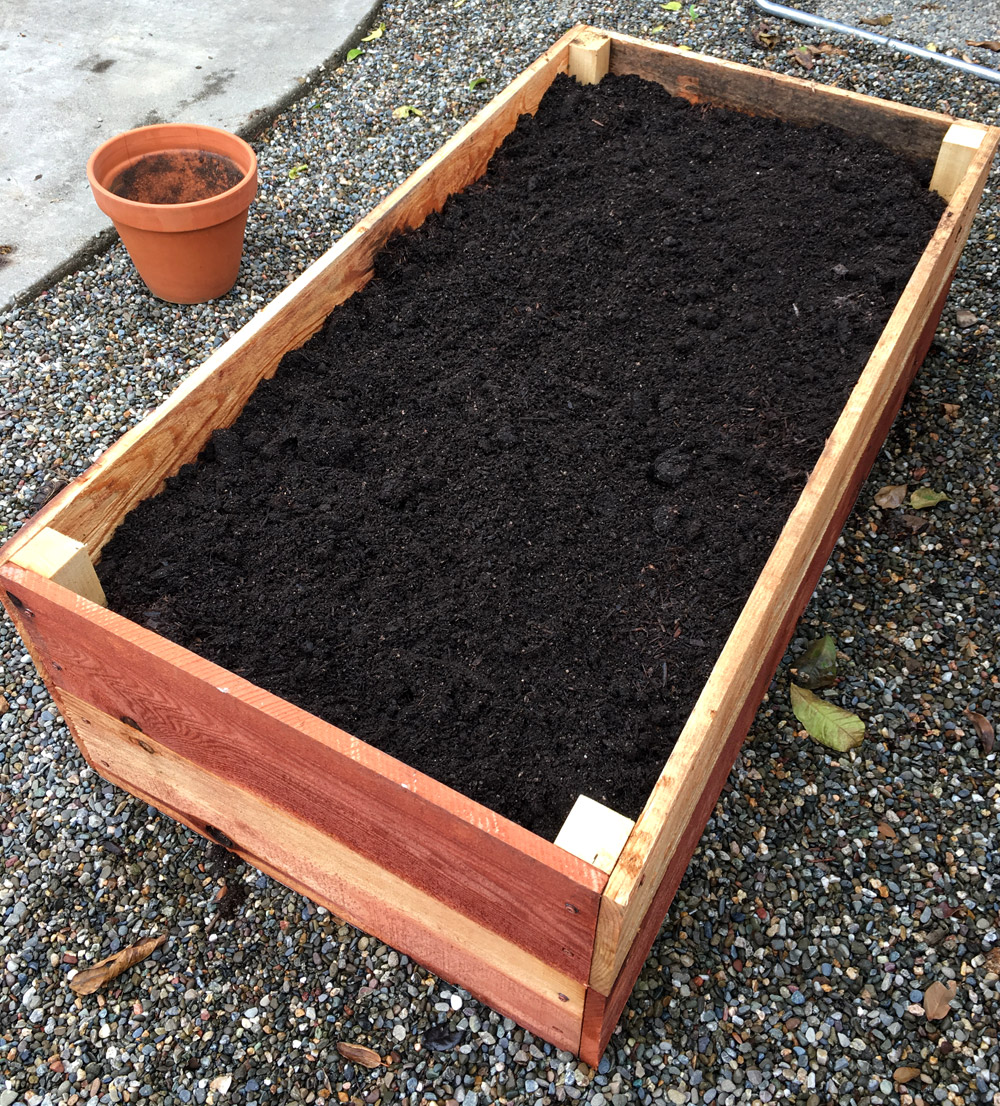
Move your new awesome planter box into-place and fill the bottom with something to keep the soil from falling through the mesh wire. I used gravel because it was handy (sorry missed a photo of this step), but you could also use wood chips or similar.

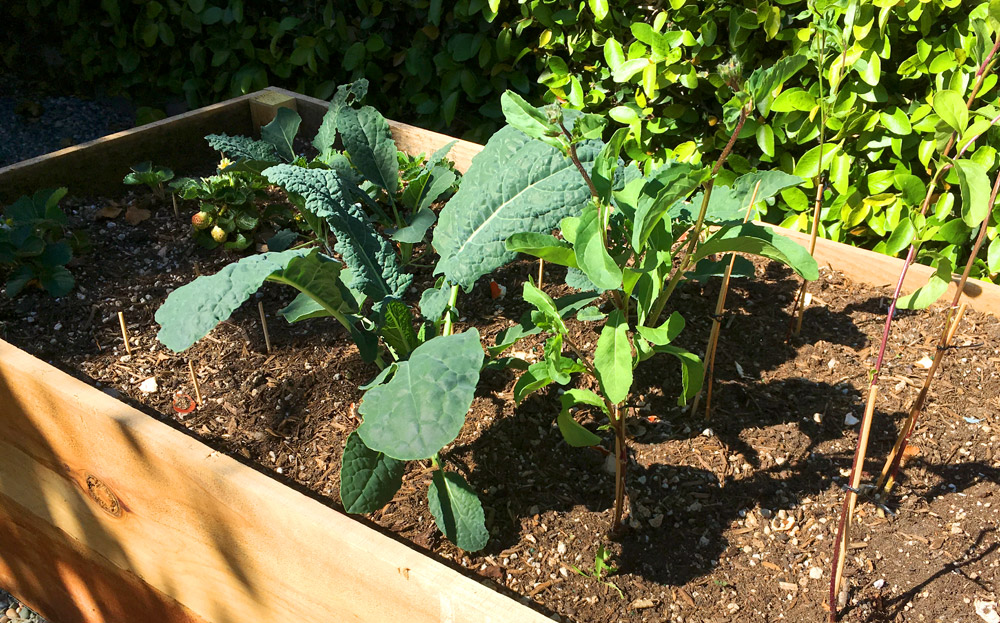
Fill-er up with dirt and plants.
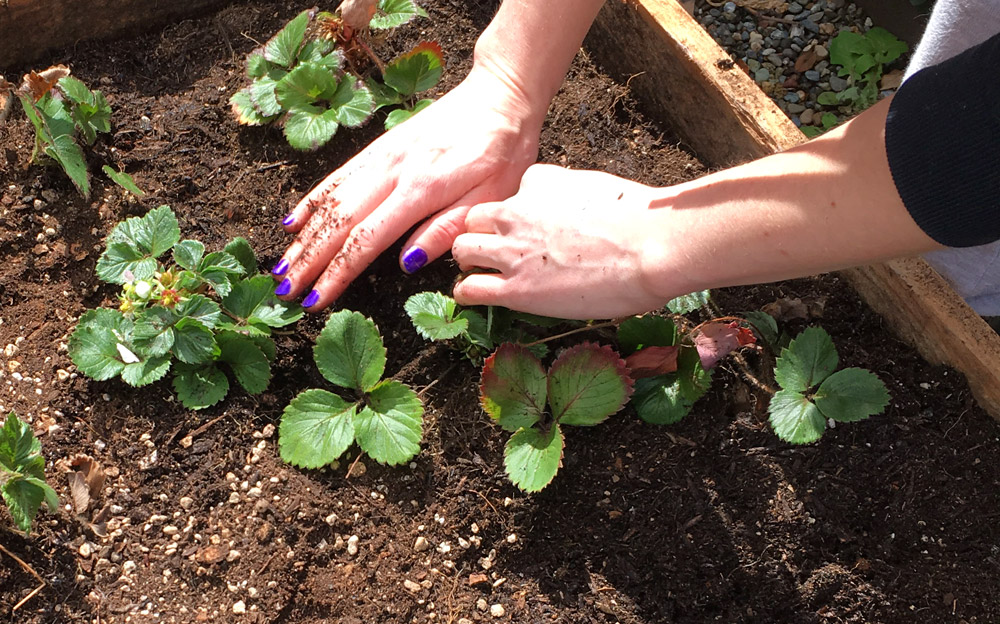
I hope this tutorial was fun and useful. Happy gardening.
Comment